

Put name as <Env_Name>_Nodes or <Env_Name>_Services and description and save it


For training on TIBCO AMX Administrator mail us at [email protected]
![]() |
|
![]() 1. Start the web-based TIBCO ActiveMatrix Administrator. ![]() 
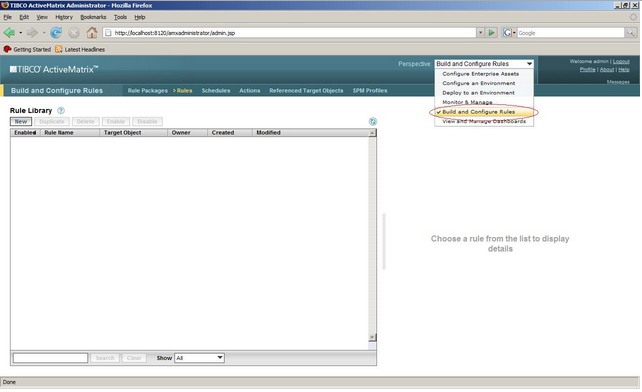
2. Select or Go to Build & Configure Rules perspective. Put name as <Env_Name>_Nodes or <Env_Name>_Services and description and save it ![]() 
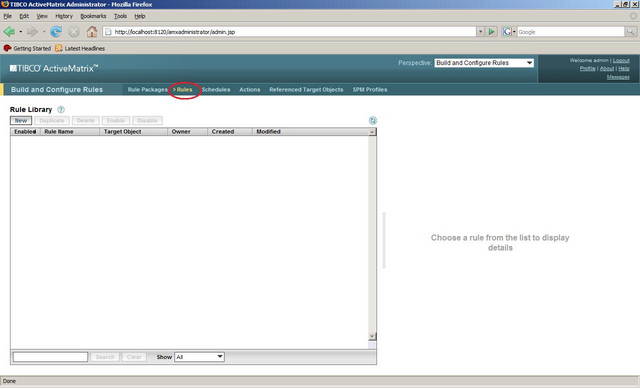
3. Click on the “Rules” Tab on Build and Configure Rules. ![]() 
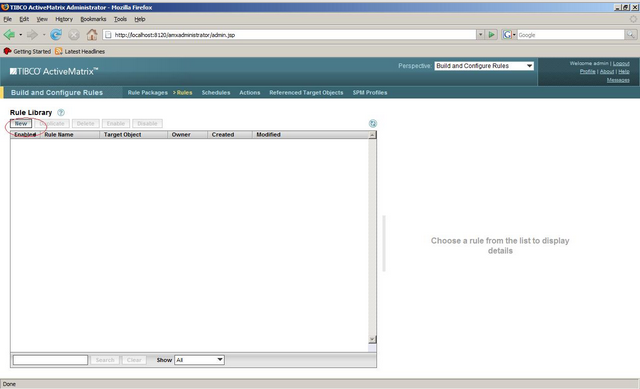
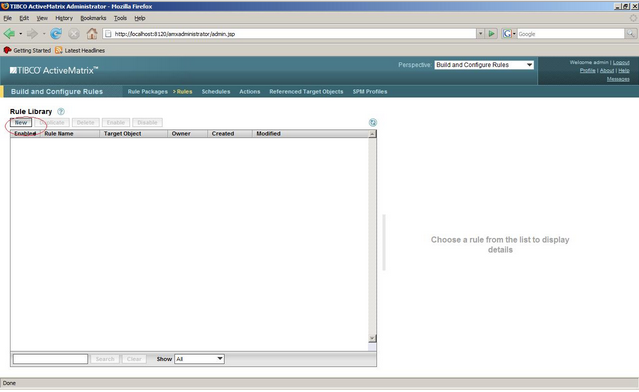
4. Click on the “New” Button on Rule Library (see the screen below) ![]() 
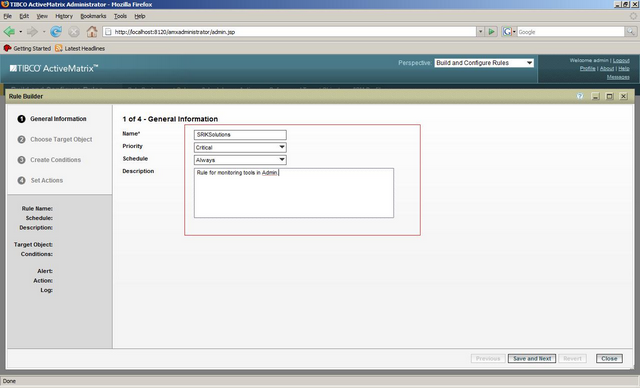
5. Click on the General Information Tab(see the screen below) ![]() 
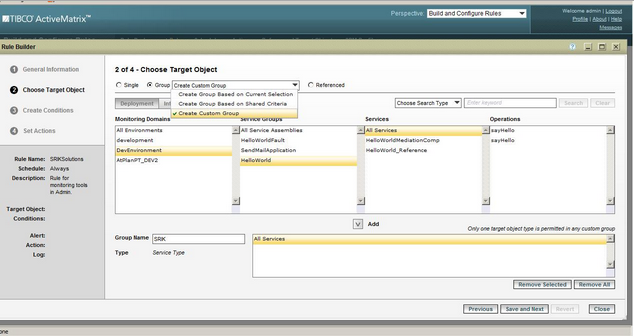
6. Choose Target Object(see the screen below) ![]() 
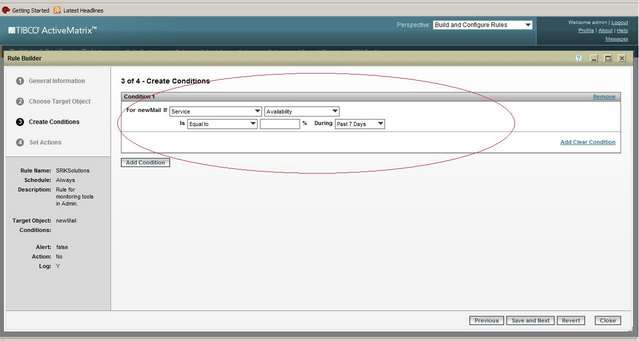
7. Go to conditions (create conditions) (see the screen below) ![]() 8. Go to Set Actions (see the screen below) ![]() 
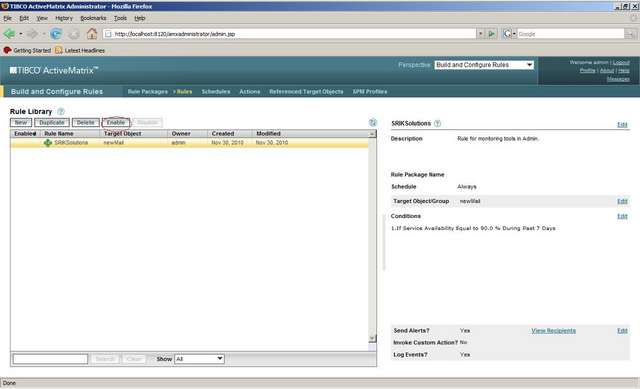
9. Enable the rule (see the screen below) For training on TIBCO AMX Administrator mail us at [email protected]
0 Comments
The steps to create service environments are
Configure an ActiveMatrix Administrator server Start the ActiveMatrix server Create an ActiveMatrix environment Create an ActiveMatrix Node Prerequisites TIBCO EMS 5.0.0 Hibernate 3.2.2 TIBCO Active Matrix Service Grid 2.2.0 Configure Environment and Node Create an ActiveMatrix Administrator Server First, you will create an ActiveMatrix server using the wizard. The Administrator server requires a database with a JDBC connection. We will use the lightweight Hibernate database that is shipped with ActiveMatrix. Steps 1. Create ActiveMatrix Administrator instance __Start HSQLDB Go to Start >Programs >TIBCO >ActiveMatrix 2.1 >Start HSQLDB Server Open the Services window (Control Panel > Administrative Tools > Services) __Start EMS: Confirm EMS Server service is running __Start TIBCO Management Daemon 2.0 Service __Start the Administrator Server Creation Wizard Go to Start > Programs > TIBCO > TIBCO ActiveMatrix 2.1 > Administrator Server Creation Wizard __ Launch the Administator Server wizard and configure Administrator Server instance
__Database URL: jdbc:hsqldb:hsql://localhost:1234/amx __Username: sa __Password: <leave blank> __Verify the parameters and click Next __Enter the following credentials __Username: root __Password: root __Click Next
__Check: User Configuration details from Database Authentication Realm __Click Next
2. Start ActiveMatrix Administrator instance __ Open Windows Services, locate the TIBCO ActiveMatrix Administrator Server service and start it OR __Start from command line. Double-click: c:\tibcoam\amxadminstrator\2.1\bin\amx_admin.bat Note: Wait for the message, “Server [Instance Name] started…” before continuing. This may take a few seconds 3. Log into ActiveMatrix Administrator. _Log in to ActiveMatrix Administrator as root/root Open Internet Explorer and type in the following url: http://localhost:8120/amxadministrator/admin.jsp – Username: root – Password: root _Click Login 4. Using AMX Administrator, create a new ActiveMatrix Environment. _In the Perspective list, click Configure Enterprise Assets _Under Environment, click the New button
5. Add a messaging bus to the Environment. Note:: An AMX Environment uses EMS for communication between the nodes. You must configure an EMS server for this purpose __Click on the newly created Environment
6. Enable your machine for this Environment. _Click the Machines tab __Click Edit __Choose YES in the Enabled column __Click Save, to save your changes __Verify Machine settings by clicking Machines, in the Main Menu __Notice that your machine’s status is Bound and Available __Note the JMX Ports: 9999 and 9998 Note: To discover other machines for your Environment, you must use the Discover option, in this tab 7. Create a JMS Shared Resource for monitoring your Environment. Note: The shared resource definition is needed, before you can configure monitoring and management for your Environment. _Click on Shared Resource Definitions tab (top menu) _Choose New >JMS and enter these details
8. Create a JDBC Shared Resource for your Environment. __Still in Shared Resource Definitions tab, choose New >JDBC
9. Enable your JMS and JDBC Resources for this Environment. __Click the Environment Definition tab __Select your environment and then choose Shared Resource Definitions tab __Click Edit __For JDBCMonitoring and JMSMonitoring, set Enabled = YES __Save your changes 10. Enable monitoring and logging for this Environment. _Click the Administrator Cluster tab _Enable Monitoring __Click Monitoring Configuration and then Edit – Enable Monitoring = YES
Log Services tab: Click New
__Highlight the DefaultLogService and click Start 11. Configure a new Node in the Configure an Environment Perspective. Analysis: A node is a basic unit in an ActiveMatrix environment representing one virtual machine. Typically, a node is associated with a jvm engine. In this step, you will create a node for your environment. _Choose the Configure an Environment Perspective from the list _In Nodes, click New
12. Install the Node and run it. Analysis: A typical order in the ActiveMatrix environment to get a node to a “Running” state is (1) Create, (2) Install and (3) Start. In this step you will start the Node created from the previous step. _The Install button is enabled. Click on it Note: After a few seconds, click the Refresh button on the same screen (right corner), Node status is Installed/Stopped _Click Start __This action takes a couple of minutes __Click Refresh, and verify that the Node is Running __Logout of ActiveMatrix Administrator when done. For training on TIBCO AMX Administrator mail us at [email protected] Solutions Description :
By Using Command Line : Ear2SA.exe <EAR_fileName> <output_Directory> where, EAR_fileName is the absolute path of the EAR file and output_Directory is the absolute path of the directory where the service assembly archive created will be placed. If the output_Directory is not specified, the working directory, ENV_HOME\amx\extensions\bw\5.7\bin , is taken as the default output directory. Example as follows : C:\tibco\amx\extensions\bw\5.8\bin>Ear2SA.exe Invalid Command. Correct usage: EAR2SA.exe <EAR PATH> [<SA LOCATION>] [-saversion <X.Y.Z>] [-suversion <X.Y.Z>] C:\tibco\amx\extensions\bw\5.8\bin>Ear2SA.exe “C:\Documents and Settings\TestUser\Desktop\AMX Examples\Application_Ear.ear” log4j:WARN No appenders could be found for logger (com.tibco.security.TIBCOSecurity). log4j:WARN Please initialize the log4j system properly. Console Output : true Started : false =============================================================== SA Archive creation started……….. =============================================================== =============================================================== SA Archive created and located at C:\tibco\amx\extensions\bw\5.8\bin\Application _Ear.zip =============================================================== C:\tibco\amx\extensions\bw\5.8\bin> For training on TIBCO AMX Administrator mail us at [email protected] 1. Login to Tibco AMX Administrator using Credentials.
2. Select Build and Configure Rules perspective. 3. Go to SPM Profiles tab 4. Click edit to edit the profile and a. Enter DL name in Address field. You can enter multiple email addresses comma separated. b. Select format as HTML c. Frequency – Every Message d. Destination Name can be anything e.g. work/home e. Language – English f. Time zone – EST g. Mark the one as default to which you want to send communications 5. Save the profile information For training on TIBCO AMX Administrator mail us at [email protected] 1) Login to Tibco AMX Administrator
2) Select Perspective:Configure Enterprise Assets –> Users & Groups –> Permissions : Select of “Tibco Active Matrix Administrator Desktop” , “Configure Enterprise Assets”, “Environment Definition”, “Environment Details & all sub items under it which is till policy managers” ——— View Permission (Do NOT remove existing permission; Do NOT select the check box) 3. Perspective:Configure Enterprise Assets –> Environments ——— View Permission ( view permission will ensure that user will not be able to create nodes ) 4. Perspective: Configure an Environment –> Nodes ———– Edit Permission ( Users will be able to deploy, undeploy, start, stop SAs mapped to the node) 5. Perspective : Deploy to an Environment –> SAs ————- Owner Permission ( Users will be able to delete existing SAs, upload new SAs) For training on TIBCO AMX Administrator mail us at [email protected] TIBCO Product Suite For SOA:
Follows Model Driven SOA Patterns.
Features: SOA Offerings
All in One Editor:
Server Startup Sequence:
Policy Manager To enforce SOA Governance. Guidelines:
Operation Of Service
SOA Policy Standards:
For training on TIBCO AMX Administrator mail us at [email protected] The goal of high-availability and no single point of failure can be achieved in matrix as below.
1. For runtime nodes, all the nodes in an environment are part of a cluster. You can deploy the same service on to more than one node. 2. For administrator, you can have more than one matrix administrator instance in an admin cluster and they point to a common underlying database. 3. The EMS server used for messaging bus, supports EMS FT, so you just have to specify the EMS FT url. This is true for SOAP/JMS services. 4. For the DB, you can use HA solutions like Oracle RAC and it can tolerate DB failure also. Again, you will specify the RAC url for the DB connection For training on TIBCO AMX Administrator mail us at [email protected] Needs of Mediation:
Types Of Mediation Task in AMSB:
Editor Features:
For training on TIBCO AMX Administrator mail us at [email protected] Using JDBC Shared Resource Configurations to be done at the following environments
Design Time / Eclipse Environment:
Run Time / Admin and Node Environment:
For training on TIBCO AMX Administrator mail us at [email protected] Instructions are almost same from Developer work station and to server other than DB, Please make sure I am using default DB you can use Oracle if you want.
1. Start EMS 5.0 2. Start the HSQLDB: From command line C:\tibco\amx\hsqldb\bin\amx-db.exe or Start -> Program -> TIBCO -> TIBCO ActiveMatrix 2.1 -> Start HSQLDB Server 3. Start the Management Daemon Start -> Program -> TIBCO -> TIBCO Management Daemon 2.0 -> Management Demon 4. Create a new TIBCO AMX Administrator Server Start -> Program -> TIBCO -> TIBCO ActiveMatrix 2.1 -> Administrator Server Creation Wizard a) The TIBCO ActiveMatrix Administration Creation Wizard window should open i) Click the Next button ii) Change the values as follows: • Server Name: ArchitektAdmin • Cluster Name: amx21 • (Keep all the other default values) b) Click the Next Button i) Keep all the default values The default password for HSQLDB user ‘sa’is blank c) Click the Next Button i) Add a new user to the database realm: • Username: admin • Password: admin (Note: admin/admin will be used to log on AMX Administrator Server) d) Click the Next Button i) Keep all the default values e) Click the Next button i) Keep the default values ( Note: The default installation for EMS v5.0.0 has the admin user “admin” with no password. 5) Now start up Administrator Server Open a DOS window, cd C:\tibco\amxadministrator\data\amx21\ArchitektAdmin\bin Run amx21_ArchitektAdmin.exe 6) Log on Administrator Server (using ‘admin/admin’) Start -> Program -> TIBCO -> TIBCO ActiveMatrix 2.1 -> Administrator Servers 7) pass on User name/Password: admin/admin For training on TIBCO AMX Administrator mail us at [email protected] |
Archives
March 2017
AuthorWrite something about yourself. No need to be fancy, just an overview. Categories
All
|