
TIBCO Domain Creation. In my configuration I’d like to use TIBCO EMS as domain transport and store domain information in MS SQL Instance. Let’s start from installation of two EMS instances in cluster.
As I said, in my TIBCO Domain will be two EMS instances: one for production data, listen on default TCP port 7222, and second for service domain transport on TCP port 7223. On the node where my cluster service group TST00-TIB01 exists, I clone default EMS configuration from D:\tibco\tibco\cfgmgmt\ems\data to cluster disk into two folders: T:\tibco\ems\7222\data and T:\tibco\ems\7223\data. Actually, only one file is necessary: tibemsd.conf. All other configuration files will be created in paths specified in tibemsd.conf when EMS will be started for the first time.
As I said, in my TIBCO Domain will be two EMS instances: one for production data, listen on default TCP port 7222, and second for service domain transport on TCP port 7223. On the node where my cluster service group TST00-TIB01 exists, I clone default EMS configuration from D:\tibco\tibco\cfgmgmt\ems\data to cluster disk into two folders: T:\tibco\ems\7222\data and T:\tibco\ems\7223\data. Actually, only one file is necessary: tibemsd.conf. All other configuration files will be created in paths specified in tibemsd.conf when EMS will be started for the first time.
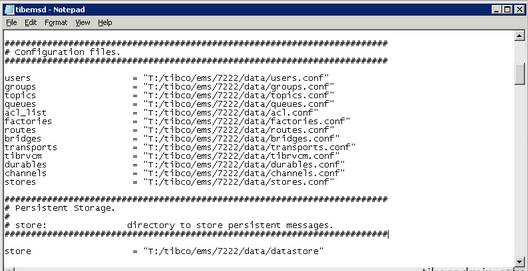
I need to correct paths in tibemsd.conf to correspond with current location on cluster disk. To specify path here use slash (/) instead of backslash (\). Important thing is setup log file and trace items for future EMS monitoring.
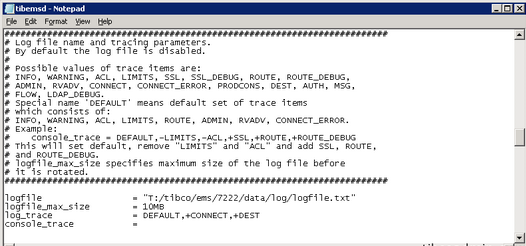
Good idea to specify max size of logfile to enable log rotation. Trace items I prefer are: DEFAULT, +CONNECT, +DEST.
For second EMS instance files will be located in T:\tibco\ems\7223\data, I will set the paths accordingly.

But one more things here: it is necessary to change listener TCP port to 7223 as it is will be second EMS instance on the same host.
Next step is remove existing TIBCO EMS Server and TIBCO EMS Multicast Daemon from services on the both nodes:
emsntsrg.exe /r tibemsd
emsntsrg.exe /r tibemsmcd
And then register two new instances also on the both nodes:
emsntsrg.exe /i tibemsd D:\tibco\ems\5.1\bin D:\tibco\ems\5.1\bin "-config T:\tibco\ems\7222\data\tibemsd.conf" 7222
emsntsrg.exe /i tibemsd D:\tibco\ems\5.1\bin D:\tibco\ems\5.1\bin "-config T:\tibco\ems\7223\data\tibemsd.conf" 7223

System services were created, so I can add these services as cluster resources. Put them under the cluster control, which will be responsible for their execution on one of two nodes.
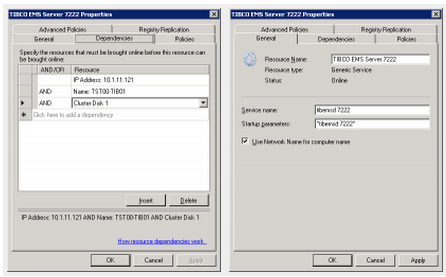
In the cluster manager I will select my group TST00-TIB01 and click Add a resource => Generic Service. Then wizard will be started, where I can select one of my EMS service. Just confirm it then and it will be successfully created and configured as cluster resource.
But I need to tune this, I will change properties. Necessary to use network name for computer name for this service. And to add dependencies from network resources and disk.
Now it’s time to do the same for EMS 7223, bring both online and check log files to be sure that everything is up and running good. Default admin user on EMS is ‘admin’ with empty password. Next I will connect to each EMS using EMS Administration Tool and set new password for admin:
connect TST00-TIB01
set password admin [password]
Now I will continue to create new TIBCO domain on primary (Master) server. Domain Utility window still open from TIBCO Administrator installation. I will select master and press “Next” to continue.
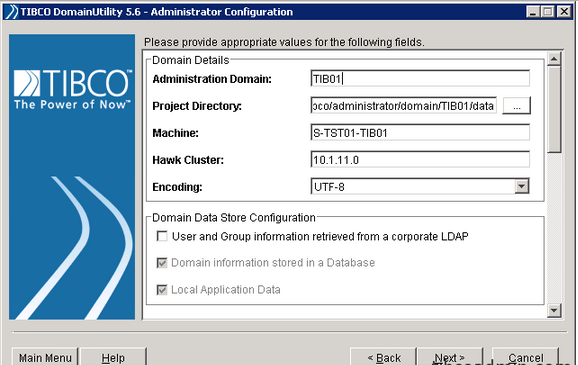
I have to enter new domain name, let it be TIB01. Then I will select UTF-8 encoding. Next, I mark “Show Advanced” checkbox and select TIBCO EMS as my transport. URL to connect is tcp://TST00-TIB01:7223 as I will use this EMS instance for domain transport.
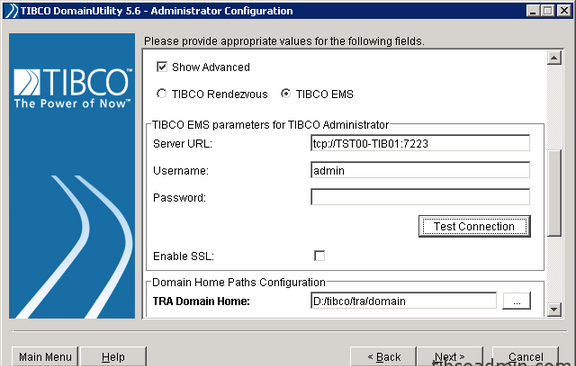
Also I will specify my EMS credentials.
TIBCO Administrator is web application running under Tomcat web server. On the next screen we can change default HTTP port 8080 to something else. For me default port is OK as it’s free on my nodes. Next screen is place to define administrator credentials for new domain: username and password twice. Remember well! It is possible to change it later but not very easy. Also it is possible to configure password policy here.
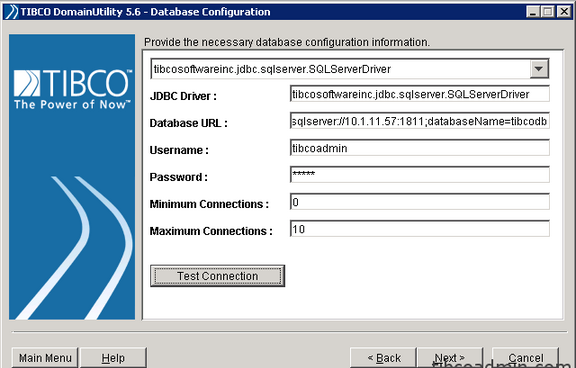
Next screen to provide database configuration information. This DB will be used to store whole domain information. Next step is the final confirmation before domain creation. After that, TIBCO Administrator will be configured and new TIBCO Domain will be created.
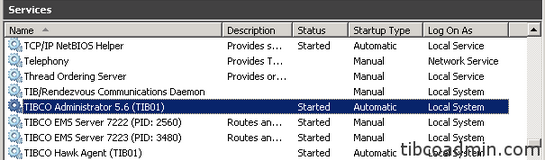
Two system services will be also created: one is TIBCO Administrator and second one is TIBCO Hawk Agent. I will go to Services and start both.
On the other host I will install secondary TIBCO Administrator server. To do that just point to “Secondary” in TIBCO Domain Utility. Then I need mark “Show Advanced” checkbox, and then specify TIBCO EMS as a transport and enter its URL. Then press “Discover”.

Just created on the first node domain should be discovered. Next is necessary to provide the administrator credentials in order to add the machine to domain. After confirmation second server will join domain and two services will be created: Administrator and Hawk Agent. It’s time to start both.

Now I can connect to the web interface to see the result. After login, two my hosts will be shown as domain members. In the part 4 I will describe how to add virtual cluster host TST00-TIB01 and both EMS into this domain.
For training on TIBCO EMS mail us at [email protected]
 RSS Feed