This is so because the WSDL representation of the binding is proprietary to TIBCO (more on this later) as there is no agreed standard for binding SOAP to JMS. Although when I was digging around I did find a ‘working draft’ at W3.org for SOAP over JMS (http://www.w3.org/TR/soapjms/) so something is being done to plug this gap!
Why all this hassle for SOAP over JMS you ask? Why not stick with good old SOAP over HTTP? Well simply because JMS transport is whole lot more robust and can be scaled up easily without affecting QoS etc.
Introducing the Example
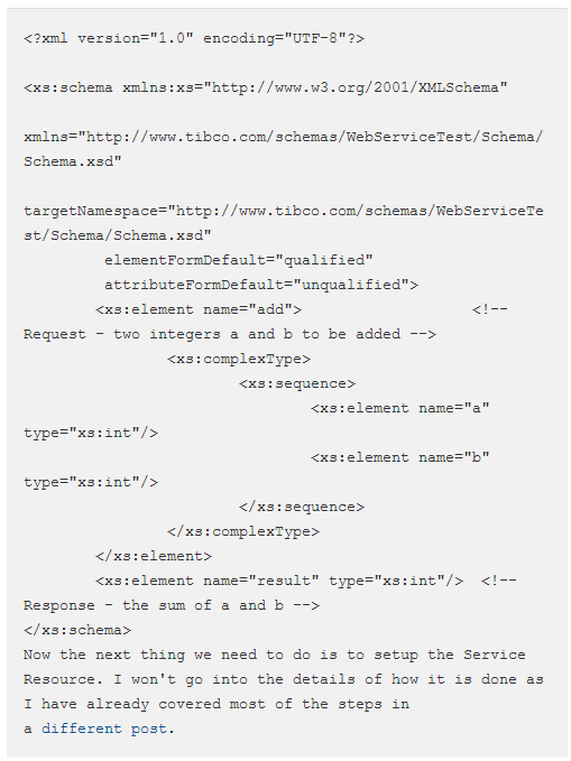
The web-service we are going to create in this example is a relatively simple one. It will take in two integers and return their sum. A fairly simple example but this post is about using SOAP over JMS so that is what we will concentrate on.
The schema for the request and response messages is given below:
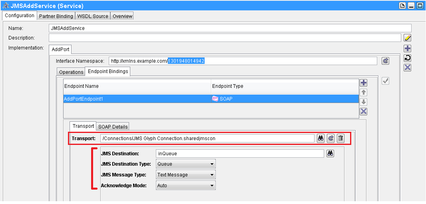
In the Transport sub-tab, if instead of selecting a HTTP connection, a JMS connection is selected in the Transport box (see image above), then you will get options to setup the JMS transport.
Setting up the JMS Transport
Setting up the Transport in case of JMS is bit more involved than HTTP. For the sake of clarity we will use Queues for our web-service instead of Topics. There are four main things to setup once you have selected a JMS connection in the Transport box. These settings are similar to those in the JMS activities such as JMS Queue Sender.
1) JMS Destination – the queue or topic which will contain the JMS message carrying the SOAP as payload.
2) JMS Destination Type – Queue or Topic (depending on what kind of interaction is required).
3) JMS Message Type – Text or Bytes message – we go for Text in the example so that we can examine the SOAP message being sent over the EMS.
4) Acknowledgement Mode – Auto for the example otherwise all the standard and TIBCO EMS specific options are available for selection.
If you select ‘Topic’ as the JMS Destination Type then you can also decide which of the Operations have a ‘durable subscription’.
That is the only difference in changing from SOAP over HTTP to SOAP over JMS as far as the Service Resource is concerned.
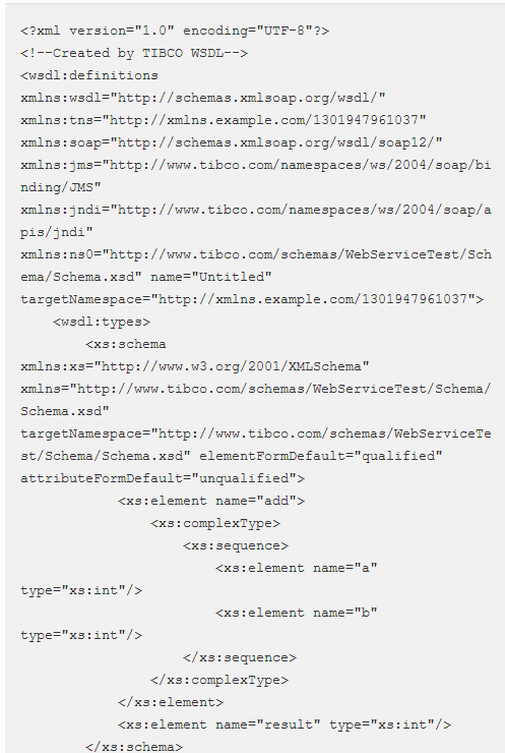
Looking at the WSDL
Once everything is setup navigate to the WSDL Source tab in the Service Resource configuration to look at the WSDL which has been generated for the web-service.
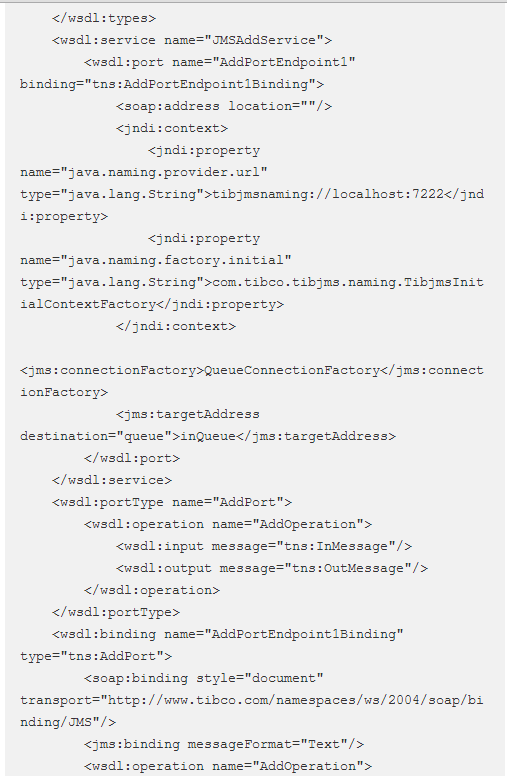
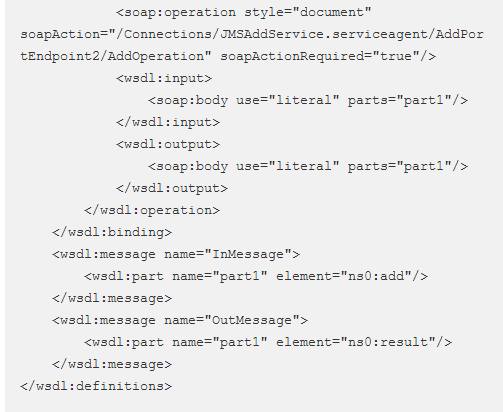
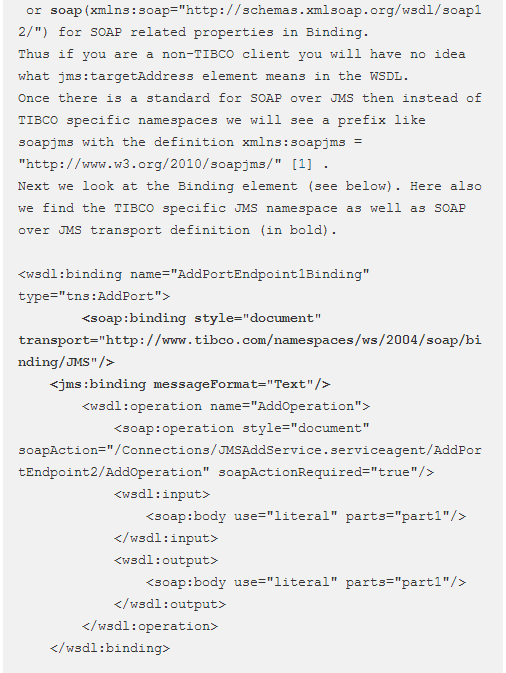
For that we need to focus down into the Binding and Service elements of the WSDL.
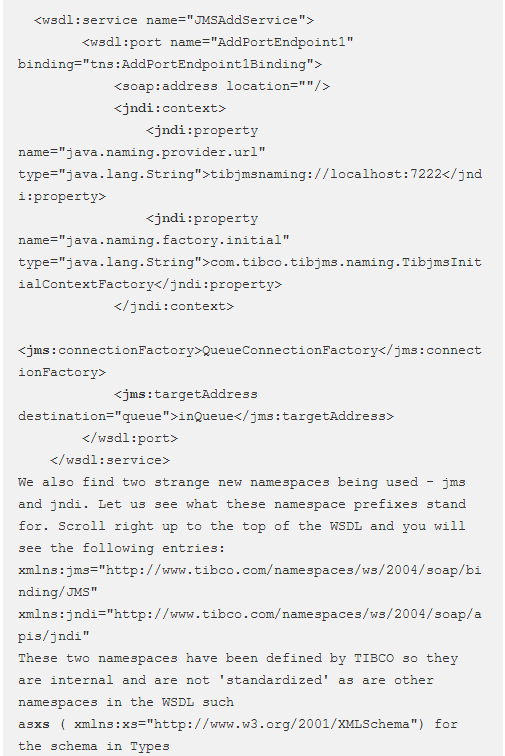
Looking at the Service element (see below), where the method of connecting to the web-service is defined. We find that it contains information about the EMS server (from the Connection resource we set in the Transport box) as well as the queue name we set in the Transport sub-tab.
If we compare the Service and Binding elements above to those in the same web-service but using HTTP instead of JMS we that all namespaces being used to define the connection and binding properties are standardized. That is what makes SOAP over HTTP web-services independent of vendors and implementation languages.
Next we test the web-service. Make sure you save the WSDL Source (i.e. the concrete WSDL) so that our test client can use it.
Testing
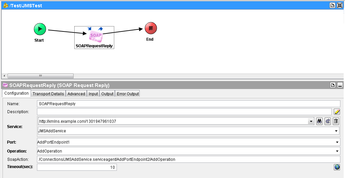
To test the web-service we will create a client using BusinessWorks. We will use a SOAP Request Reply activity to test the web-service. The images below show how to configure the activity to access the web-service.
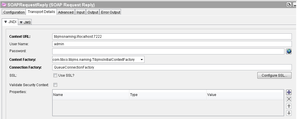
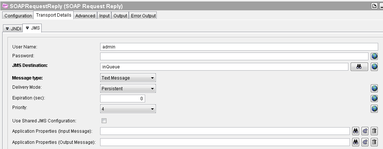
In the configuration simply select the namespace from the concrete WSDL file we saved for the client. As we are using TIBCO to create the client once you set the WSDL everything will be auto-populated. Go to the Transport Details tab (see below) and there you will see the JNDI and JMS sub-tabs which have also been auto-populated from the WSDL. This is so because TIBCO understands the jms and jndi namespaces and knows what to do with the information in the WSDL.
JNDI Sub-tab:
JMS Sub-tab:
After loading the WSDL and saving the changes the SOAP Request Reply activity will ask you for an input (the two integers to be added).
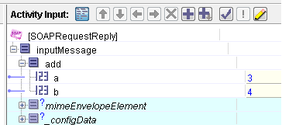
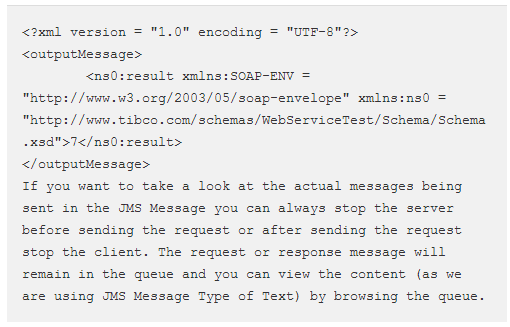
Save everything and load the relevant processes. On starting the test you should see the Request being fired. If you monitor the relevant queue you will see a message being posted on the queue. The message will be consumed by the web-service and it will return the result back to the queue which in turn will be consumed by the client and you will see the output in the process. As we provided ’3′ and ’4′ as the two integers to be added in the input (see image above) the result we get is ’7′ (see below).

 RSS Feed


