Get the latest installer from SourceForge:http://sourceforge.net/projects/hermesjms/files/ then run it:
java -jar hermes-installer.jar
Installation is very simple, just few screens: release notes, license agreement, installation path, components (here is only one actually), summary, files copying, shortcuts creation and installation finish.

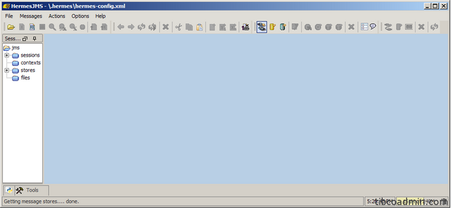
To start HermesJMS run hermes.bat in your <installation_folder>\HermesJMS\bin. If you got error message “cannot find \bin\javaw”, make sure that you have JAVA_HOME system variable defined to your jre folder.
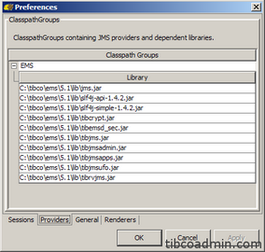
When Hermes started successfully, click on “Create new JMS session” button, preferences window will appear, select providers tab and right-clik on free space. Then press “Add Group” and enter group name. Right-click on “Library” and press “Add JAR(s)”. Look in <tibco_home>\ems\5.1\lib folder and select all .jar files there. Click “Open”, then let Hermes to scan jars for factories: press “Scan” button.

Then press “Apply”. All libraries will be in the list like on my screenshot.
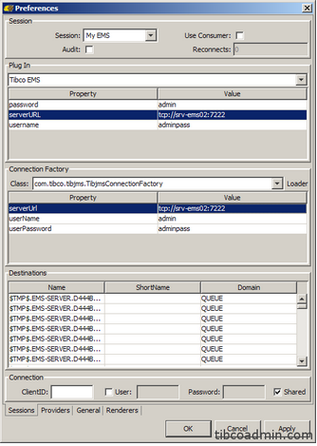
Go to “Sessions” tab and enter name for session: “My EMS” for example, then select “EMS” loader.

Next step is select “com.tibco.tibjms. TibjmsConnectionFactory” class and “Tibco EMS” plugin. Order is very important: select loader, then class, then plugin. Right-click on free space in plugin section and press “Add property”. You have to enter all three properties: username,password and serverURL, do the same for Connection Factory, then press “OK” to save and close properties window.
Now we can connect Hermes to our EMS. Let it discover queues and topics, press “Discover queues and topics from the provider” button. Then confirm replacement of the current set of destinations and list will be updated. That’s all.
For training on TIBCO EMS mail us at [email protected]

 RSS Feed


