In the test environment, the tools will automatically configure the required dependency libraries for you except when native libraries are used, for example, with the WebSphere Adapter for SAP Software or the WebSphere Adapter for JDBC, if using a Type 2 driver that uses native libraries.
For a production environment or testing on a remote server, however, you must add references to the dependency libraries. The following sections show you how to configure the dependency libraries for adapters with either stand-alone deployment or EAR deployment.
- Stand-alone deployment
- EAR deployment using the administrative console
Stand-alone deployment
The dependency libraries may be added to the stand-alone deployed adapter either during initial deployment of the RAR file or by configuring the adapter properties after it has been deployed.
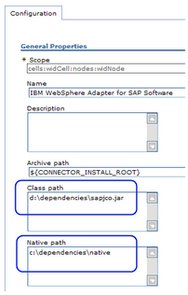
To set the values during initial deployment of the RAR file, from the navigation of the administrative console, select Resources > Resource Adapters > Resource adapters. Install the adapter and, afterwards, add the paths to the Class path and Native path sections, before saving your configuration.
The class path is used to point to JAR files and the native path is used to point to folders containing native libraries, such as *.dll and *.so, as shown in the following figure:
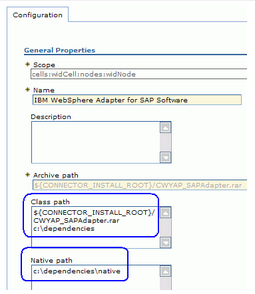
To set the dependency library path files after the adapter has been installed on the server, use the administrative console to modify the values for the adapter.
From the navigation of the administrative console, select Resources > Resource Adapters > Resource adapters. Select the installed adapter and, afterwards, add the paths to the Class path and Native path sections before saving your configuration, as shown in the following figure:
If the dependency libraries can be loaded by the application, then you do not need to take any further steps. The dependency libraries are included in the connector module.
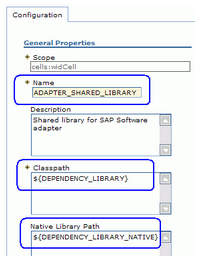
However, when native libraries are used, the dependency libraries are added as WebSphere shared libraries. You define the shared library containing external dependencies and associate them with the server.
To use the administrative console to add the dependency libraries as a shared library, follow these steps.
- Make sure the dependency files are available on the server machine in the separate folder. If needed, copy dependency files on to the server machine.
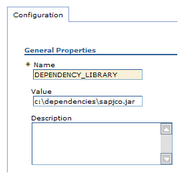
- Define variables, one for the class path and one for the native path. The class path is a semicolon-separated list of absolute file paths to each library. For the native path, the value points to folders. To define a variable, select Environment > WebSphere Variables, which opens the WebSphere Variables page. Select the scope of your variable, for example, widCell. If you are uncertain about which scope is suitable, a link on the page provides help on the scope settings. Click New and create your variable pointing to a dependency library. Then click Apply and Save to add the variable to the list of variables on the server.
- If a native library is dependent on other native libraries, the dependent libraries must be configured on the LIBPATH of the JVM hosting the application server (rather than on the native library path shown in the above figure) in order for that library to load successfully. You should configure an environment entry by selecting Servers > Application Servers > server_name > Java and Process Management > Process Definition > Environment Entries (where server_name is the name of the server; for example, server1). On the Environment Entries page, create a new environment entry to specify the LIBPATH of the JVM.
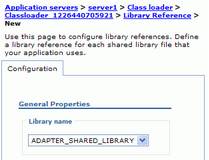
- To associate a shared library with the server, select Servers > Application servers and select your server from the list. Check that the Classloader policy and Class loading mode fields are correct for your requirements. Then set your shared library on the server by scrolling to Server Infrastructure on the same page and expanding Java and Process Management. Click Class loader. On the following page, click Newand Apply to configure a class loader ID. On the next page, click Shared library references. Click Add on the following page and add your shared library. Then click Apply and Save to save the configuration and restart your server.

 RSS Feed


